Google RSS Feedburner stands for "Rich Site Summary". RSS feed-burner facilitate readers to get their favorite site/Blog updates into their email box directly. Its Setup with Google and its a great tool for internet marketing. There are many free Email Marketing futures in RSS Feedburner tools. RSS Feedburner is one of the most essential part of a blogger to set up for their blog. Some features of RSS Feedburner are listed below.
Its a free Email Marketing Tool with 100% Email delivery on time. Its Owned by Google and Easy to use, manage & easily be integrated with any theme.
You can easily get full control over your subscribers and you must setup RSS Feedburner in your blog/site from First Day. You can monetize your ads with RSS feed if you have Approved Google Adsense Account. You give option to your readers to subscribes blog for receiving any updates in their Email and also you can easily track the performance using this tool.
How to Setup RSS Feedburner for Your Blog?
So, lets get started with our guide. First of all I prefer to use your domain/brand name in your feed name. Its quite better for Search Engine Optimization of your blog. You can put more functionality in your blog feeds, using the Google Feedburner tool. So follow the step by step guide below to setup RSS Feedburner for your blog.
So, lets get started with our guide. First of all I prefer to use your domain/brand name in your feed name. Its quite better for Search Engine Optimization of your blog. You can put more functionality in your blog feeds, using the Google Feedburner tool. So follow the step by step guide below to setup RSS Feedburner for your blog.
- To setup RSS Feedburner on your blog you need a Google account to login if you don't have any gmail account then first you create a Google account. You required a Gmail account. If you don’t have one, you can sign up for free on Google.
- After sign up your Google account, go to feedburner.google.com and Login with your Google account. In text bar you write you website / blog feed Url address and click on Next button.
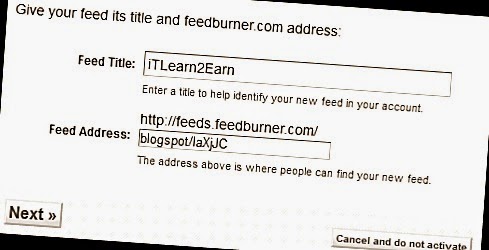
- Next page checks on the first option and click Next button. Now write your feed title and address. You must write your feed title like as your site/ blog name and if your blog feed address is long or already registered in Feedburner then you write a short address of your RSS Feedburner. Once you can do it, then click on next button.
- You are done, On the next page you will get a confirmation message from Feedburner about the successful feed creation.
- You have successfully updated the feed "itlearn2earn" (your blog feed title). You see, Google feedburner dashboard, Now click on Publicize, its show a different option for setting an RSS Feedburner.

In the left sidebar have many options like Feed Count, Socialize, Chicklet Chooser, Creative Commons, Nolndex and etc.
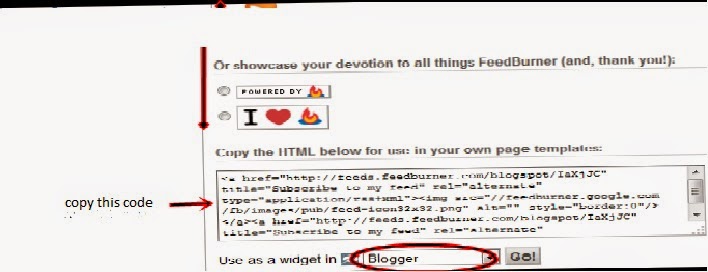
- Go with Chicklet Chooser. RSS Feedburner HTML Setting show on the right side (show in the figure), Choose any icon for RSS feeds that you like, select blogger in the footer and click on Go! button.
- After doing this copy HTML code and insert in your blog page templates, just save the template and you have done.

Your Feedback is highly valued & appreciated.


