Freelance Jobs

Monday, March 31, 2014

Search Engine Optimization

Search-Engine-OptimizationHow to submit your site/blog to "Bing Search Engine" with Webmaster Tool. 

Webmaster tools play an important role to increase traffic and get high page rank for website/ blog.With out use of webmaster you never achieve any goal. Its valuable tool like other "Google Analytical" Google Ad-word" and "Google Ad-sense". Webmaster is an SEO tools that help you to take your site/blog on the top. After making your site/blog you need to submit a site to all main Search engines.There are three main search engine "Google, Bing and Yahoo". First of all submit a site/blog on Google search engine with the help of "Google Webmaster Tool" and then submit to Bing and yahoo.
Today I'm going with "Bing Webmaster Tool" to add site/blog on Bing and Yahoo search engine.
    Search-Engine-Optimization
  • Go to "bing webmaster tool" and create you bing account. You need a Hotmail email id for this. If you have already account, then just sign-in your Bing account.
  • Now you see Bing Webmaster tools "Dashboard", here click to "My Site" or "Add a Site" in the left sidebar.
  • In a new window write your Site URL in text bar and click Add button.

Search-Engine-Optimization
After processing you can see, you site show in Dashboard with site analyzer and many other future tools. Its enough to submit your site/blog on google and bing. when you submit site to bing its automatically submits to yahoo search engine. Viewer keeping visiting my blog and give you valuable feedback.

Saturday, March 29, 2014

How Data can be Imported from a Website

How-Data-can-be-Imported-from-a-WebsiteHow to transfer data from another site/blog.
Today I’m bringing a new tutorial “how to Import Data to a new site/blog” for all of you. Most of us want to change their site domain and upload their existing data on that site. You can do it easily after reading this tutorial. There are many methods to transfer data for different sites, like Manually, with script, MySQL and FTP. 
In this tutorial I tell you how can you import and export data manually with .XML file.

There are few steps to follow. 

How-Data-can-be-Imported-from-a-Website
1. Go to your site which you want to export. Log-in your site
2. Configure Setting and choose another.
3. Click on “Export Blog” and download Blog.
4. Now Log-in your new site/blog where you want to upload data.
5. Then go to the Setting and then another.
6. Select an “Import data” its show a new window.
7. Browse an “exported blog file”, type a chapter and click on Import Blog. If you check an “Automatically publish all imported posts and pages” then its publish automatically otherwise its save as draft.You can publish it any time when you want.
8. You can easily Edit and delete your imported content like a normal post.
I think you can get it easily with the help of this tutorial if you have any concern then contact with me @itlean2earn

Thursday, March 27, 2014

Free Screen Recorder

How do you record your computer screen live.

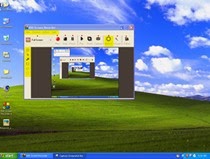
Free-Screen-RecorderToday I'm coming with tutorial "Record your Computer Screen", in this tutorial I tell you how can you easily record your screen for video tutorials, Video Presentation and much more. first you need any screen video recorder just click this link and download "BSR Screen Recorder" or which one you like. Install screen recorder. When you successfully install it, then double click on Screen Recorder 6 on your dashboard. Here you see the record Window. The Menu bar contains View, Options, Editors and help factions. In Icon menu have full Screen, Rec, Stop, Pause, Play and Capture Button.
First click on the Option button or go to the menu bar and options. In new the window click, on-screen tab here you select a screen which you like.
In second Video tab, check different option like Record Mouse Pointer, Record Date & Time etc or check on "Automatic" box. Next Audio tab have audio setting and in file tab you can select where you save record. Its default save in Temp file so you must change it. Hotkeys contain shortcut keys which you used during the recording. In Options and About you just read and check which you need and other leave as. Then click on "OK" button, if you want to set it to default, then click on "Restore Default". 


Now you can set up for recording your videos.

1: Click on Red Button "Rec" for start recording.
2: For finish the recording, click on stop.
3: Capture Icon takes a picture during recording.
4: Wizard and Editors used for editing video.
when you click on stop icon, its seem a new window for saving recording video just save the video and enjoy it.
 I tried to clear all things about this lesson to you if you have any question about it then contact us. Give your feedback about this tutorial.

Tuesday, March 25, 2014

Google Adsense

Google-AdsenseGoogle Adsense is Too much effective source of online earning. In my earlier posts i describe how can you Make Money with Google Adsense. Now i am going to tech you How can you Apply for Google AdSense. i tried to tell every thing that i know. In google search write down "sign-up for google Adsense" and click on first link of google results "Apply for Google Adsense". 

There are 3 main Steps.

1: Select Google Account:-

In this step you need a google account if you have already account then click on "Yes, Proceed to Google Account Sign in" other wise click on "No, Create a New Google Account".
Note* there are some condition for user. You must have at least 18 years old and verified Google account. Your Website compliant with google Adsense policies and valid mailing address at which you receive bank statements.

Google-Adsense2: Tell Us About Your Content:-

In the first tab you write a website address where you'd like the Google Adsense magnetization products displayed. Second tab show language here you select language. In the below you see 5 Google Adsense conditions and term policies you must follow these rule otherwise its difficult for you to get approval of Google Adsense.

3: Submit Your Adsense Application:-


Be careful to fill up this form. Don't use any spam or wrong information. In first tab write you country name and select the time zone of you country. Check one of "Individual" or "Business". Then your full name, street address, city and phone no. All these information match you identity Card (ID Card). After this check "Customized help and performance suggestions" box and click on "Submit my Application".

You have Done. You will receive Email from google Adsense its will be taking One week.

Sunday, March 23, 2014

How To Make Money

How-To-Make-MoneyHow to Make Money With Google Ad-sense. Earning with Google Ad-sense is real way to make money. Here i teach you how you can earn money with Google Ad-sense. First you create a website and upload at-least 20 Posts with "450" words and get good traffic on you site like 100 users per day. After this Apply for Google Adsense Account. You can publish google ads on many site if you verified Google ad-sense with any website.
  There are some more Important things that you must do. 

Apply Google AdSense with website:-

  1. Website should be top level domain name like "example.com".
  2. You must be at least 40 Original content or articles that contain up to 350 words.
  3. Website template design should have clean and user friendly.
  4. Your register website up to 3 months old.
  5. Traffic on you website between 100 to 150 visitors per day.
  6. Most of them users come from SE (Search Engine) Google, Yahoo and Bing.

Verified Google AdSense with YouTube:-

    How-To-Make-Money
  1. You upload at-least one original video that's created by yourself.
  2. Don't use Copy right, claims, matched and content.
  3. No games, no software, no cracking and no pron upload on your site.
Account that verified with you-tube is called "hosted account" and in this account you have only use one website for ads punishment.


Friday, March 21, 2014

Prestashop Related Products

Prestashop-Related-ProductsHow to Upload Product in PrestaShop. 

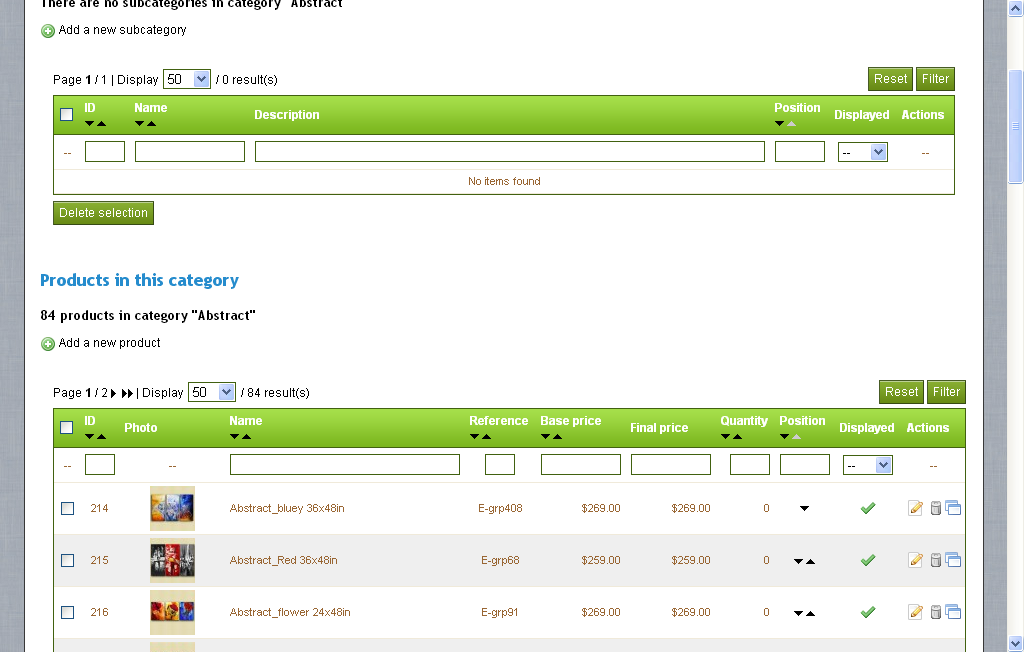
In this tutorial i teach you how to upload product and their picture in prestashop store. First you need prestashop login key and passward. After lo-gin Click on Catalog tab. In catalog you found different category of product. Select the Category where you want to upload product then click on it.
Prestashop-Related-ProductsIts Appear a new window of product. Click on a "Add New Product" and input a product Name, Description, Price and Other detail. "see this picture" In the prestashop you can also Create new category that you like.
You can easily upload any things that you want like price, picture, name and description.Here you can also Edit, Delete, Display and Hide you Product easily.


Freelance Jobs
Recommend Us On Google
Like Us On Facebook